
Today I am continuing the challenge to choose six items from the cupboard – see yesterday’s blog:
Pressure Stencils – a technique that I’ve used a lot on silk but this time I’m working on Vilene. It gives a less sharp effect but slightly fuzzy can be good, so off I went
The piece of Vilene was placed on a black plastic bag, sprayed with water and then sprayed with Adirondack paints and Brusho – any strong colour will do. It needs to be thoroughly wet.
Then the stencil was placed on it and kept in contact by placing some objects on top to hold it down. Nothing too heavy should be used or the colour will migrate (although this can be interesting). Leave to dry without peeking. See pics below.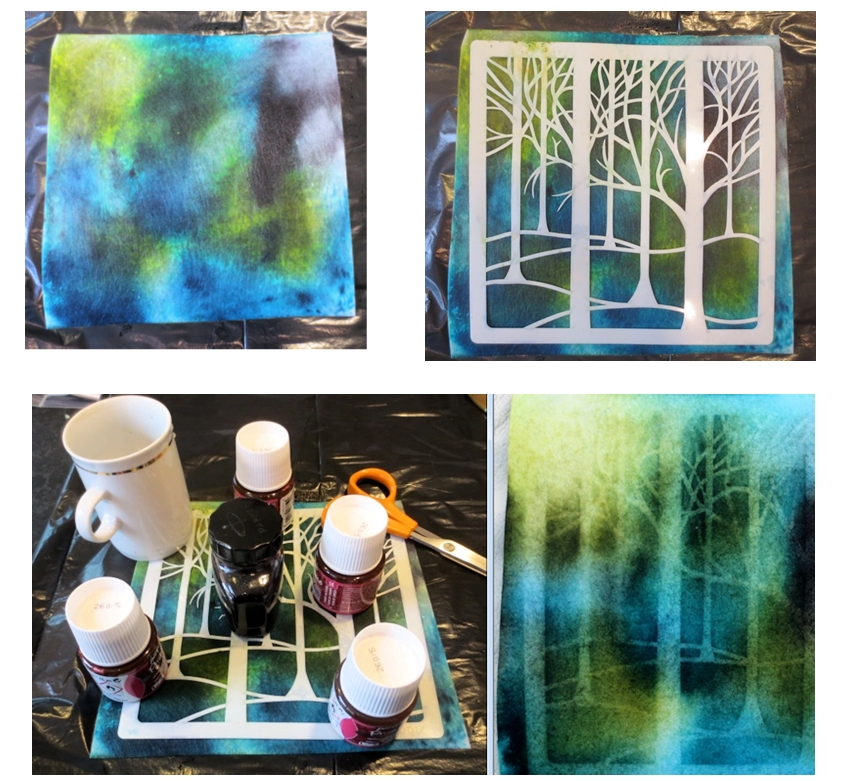
The Vilene worked really well: I love the burst of yellow at top left – looks like the sun peeking through the trees. This piece could be worked just as it is with hand or machine embroidery.
However, I was on a roll with the shadow stuff so another Vilene tree was cut out (see yesterday’s blog) using the stencil as a guide but concentrating just on the central portion. Then a piece of the finer Lutradur 50 was wetted and sprayed lightly using the same blues and greens as before but adding just a touch of terra cotta colour. I’ve used sprays but it doesn’t really matter – paints or Brusho would be fine. See below.

The tree cut-out was placed on the background, moving it around until it achieved a harmony with the shadowy pattern elements of the background (see below left). When the Lutradur piece was dry, it was placed on top, forming the top layer (see below right). I used FuseFX to bond the two layers together before machine embroidering around the trees.


Finally (I couldn’t resist it) I used a heat tool, just a little to show more of the background. That is it for today – more tomorrow, folks.


Please could you explain what a pressure stencil is.
This is the method described at the beginning of the blog post above where a plastic stencil is laid on wet painted fabric.